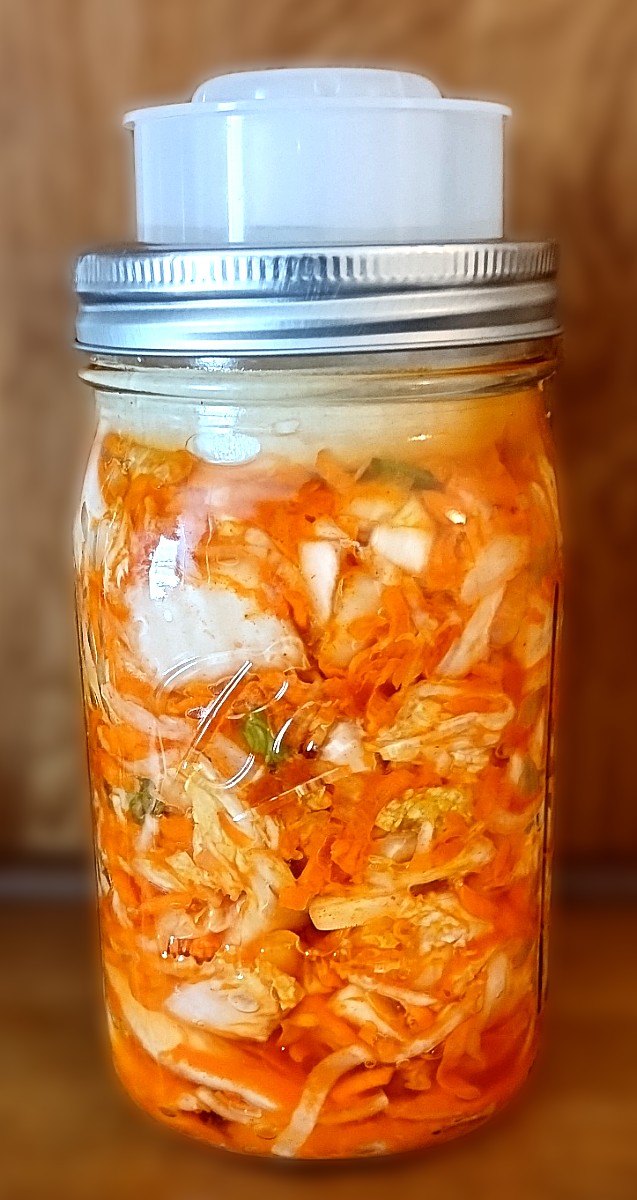
I bought a nifty little kit for fermenting foods in a wide-mouthed quart jar at a health food store around 2019 or ’20. It was made by a company called Ferment’n and it looks like the company is no longer in business, but there are probably other kits like it on the market.
At the time I was making kimchi and sauerkraut in a gallon-sized crock. I gradually fell out of the habit because four quarts were taking up a lot of space in the fridge. Making a quart at a time will be quite handy so I cut down my recipes by a fourth and they fit quite nicely.
Ingredients:
1 lb. Napa Cabbage, chopped
¼ lb. Carrots, shredded
¼ lb. Radishes, shredded
2 Spring Onions, chopped
2 cloves Garlic, chopped
2 ¼ tsp. Sea Salt
1 tsp. Sugar
1 tbs. Gochujang Paste
1 tbsp. Vinegar
Directions:
Combine all the ingredients. It will take 10-15 minutes for the salt to wilt down the vegetables to allow for packing into the jar. Once packed into the jar, place the weight on top and press down a bit. Apply the fermentation lock as directed and let sit at room temperature for at least three weeks.
I prefer to transfer it to a new jar and refrigerate. The mixture will continue to ferment and develop flavor.
I started writing for a magazine put out by a nonprofit called the Iowa Barn Foundation. The foundation is an all-volunteer organization dedicated to preserving Iowa’s iconic rural buildings. It raises money to provide matching grants to help property owners restore their barns and educates the public through the magazine and barn tours.
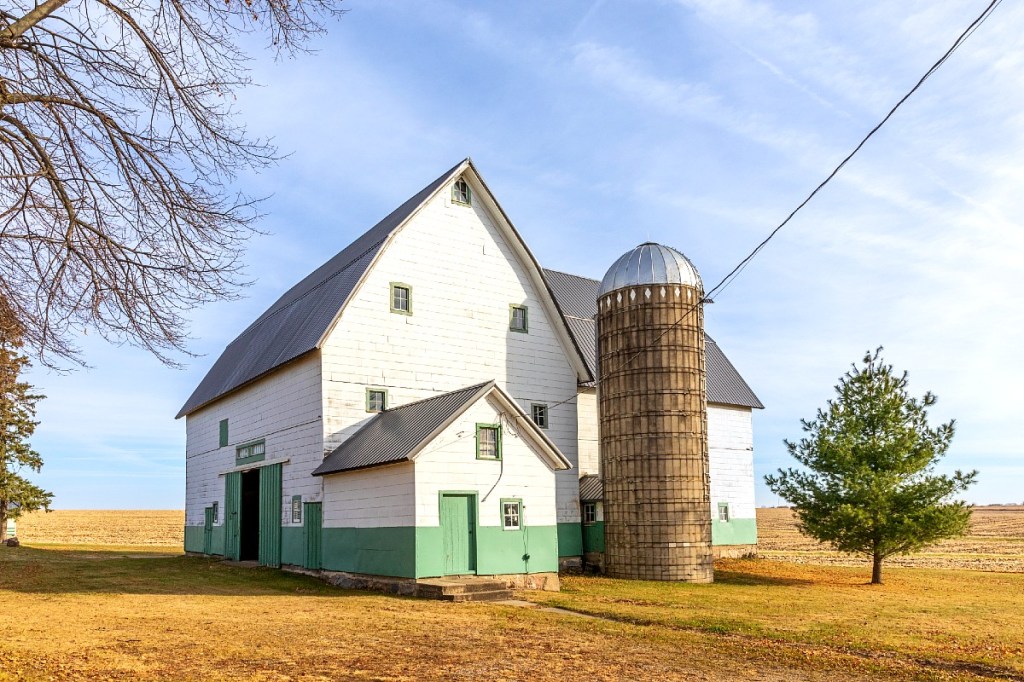
For the Fall 2025 tour, I visited the Platz Barn north of Waterloo, Iowa. The barn is a commanding presence on the wide-open landscape with its white paint, green trim and a uniquely angled roof that was the result of a sawmill apprentice error when the barn was built in 1894.
Platz Barn photo by David Austin
I had a delightful visit with Miriam Neessen and Marie Schildroth who are twin sisters who grew up in a giant house on the farm with their grandparents Levi and Elizabeth Platz, parents Clarence and Blossom, Aunt Edith and Uncle Ray. Their grandparents purchased the farm in the heart of the Great Depression in 1932 and raised crops, dairy cattle, hogs and chickens.
The family had a smokehouse to smoke hams and grew produce in three large gardens along with an apple and cherry orchard. Miriam recalls, ”We raised raspberries and strawberries and we shucked peas until you thought you couldn’t shuck anymore. We canned a lot of apple sauce and Aunt Edie canned cherries and made pies from them.”
Aunt Edith was the last remaining sibling and she continued living on the farm until she passed away in 1999 at the age of 97. For the tour, Marie and Miriam made Aunt Edie’s recipe for sugar cookies in the shape of a barn and decorated them in the white with green trim color scheme their farm is famous for.
The cookies had a good buttercream frosting, but since I don’t have the family recipe I did not include one here.
Ingredients:
3 ½ cups (420 grams) All-purpose Flour
1 ½ cups (297 grams) Granulated White Sugar
2 tsp. Baking Powder
1 tsp. Cream of Tartar
1 tsp. Vanilla
3 large Eggs
1 cup (226 grams) Butter
Directions:
Mix flour, sugar, baking powder and cream of tartar. Add vanilla and eggs. Cream in butter until well mixed. Chill. Roll into small balls and flatten. Bake at 350° for 8-10 minutes, depending on the thickness of the cookie.
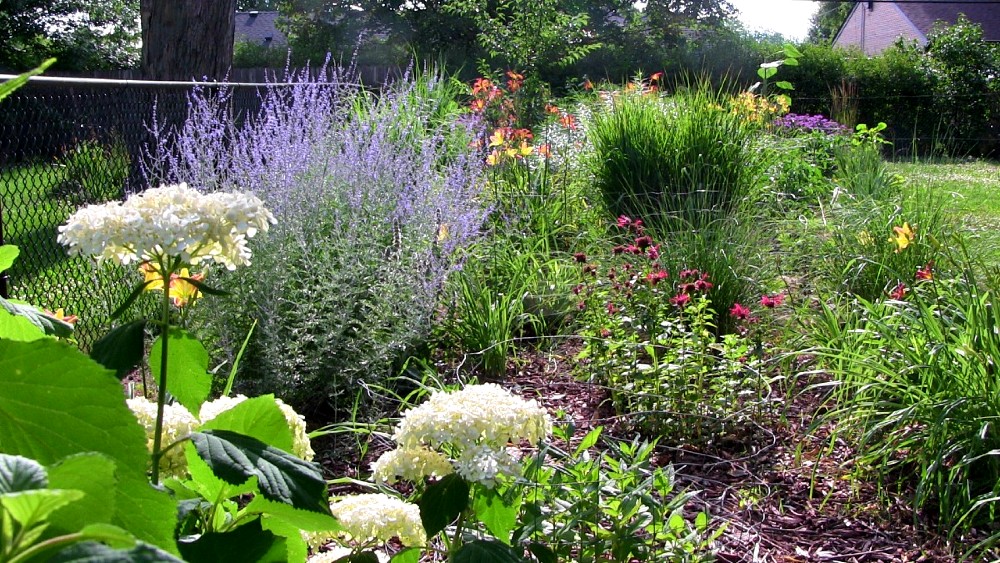
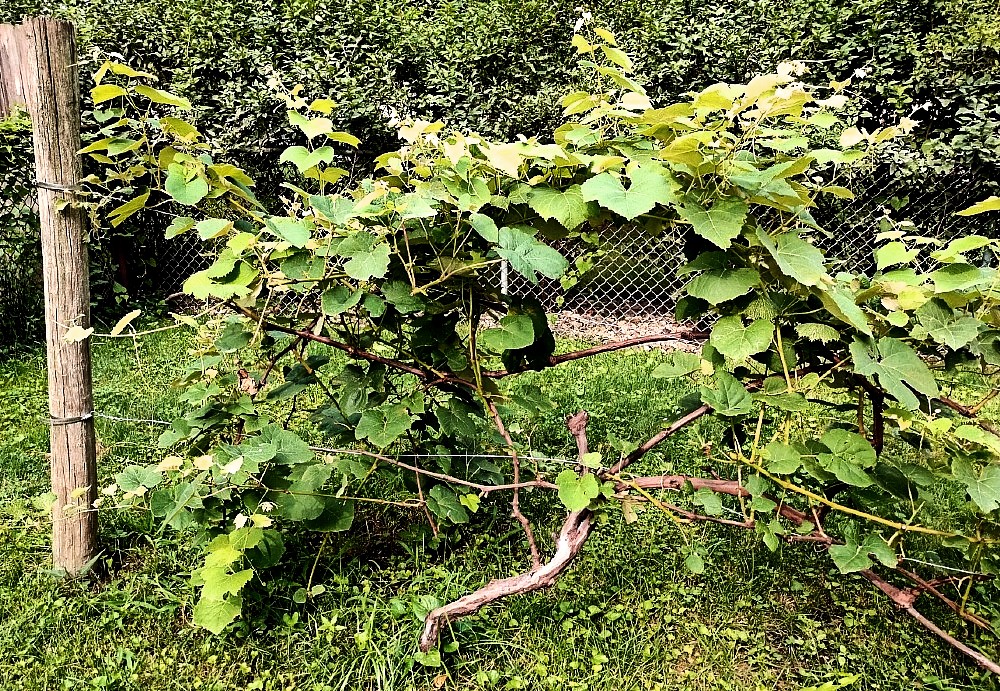
The original owner of our house made wine as a hobby and was an avid gardener who planted Marechal Foch grapes back in the 1970s. We’ve built on his legacy by converting a significant amount of the lawn into a haven for pollinators and wildlife of all kinds with prairie grasses and perennial flowers.
Lawn converted to Perennial Garden
We’ve kept his original produce garden going and enjoy the rewards from it all year long, not only the fresh fruits and veggies in season, but also preserving them through canning and freezing to make use throughout the winter. Grape jam and grape juice have been my favorite way to preserve the strong cherry flavor of the Marechal Foch grape.
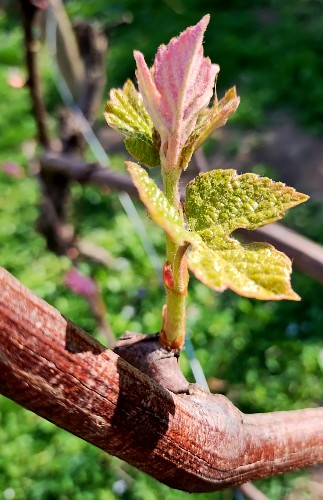
Marechal Foch Grape Blossom
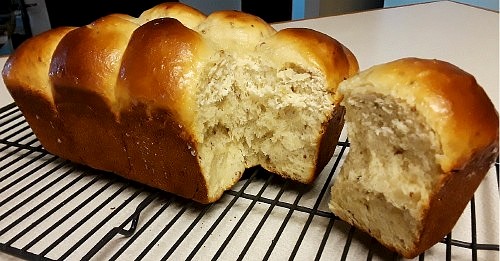
I love canning the juice and enjoying it mixed with sparkling water or baking it into a bread called Mosbolletjies. Homemade grape jam goes well with it.
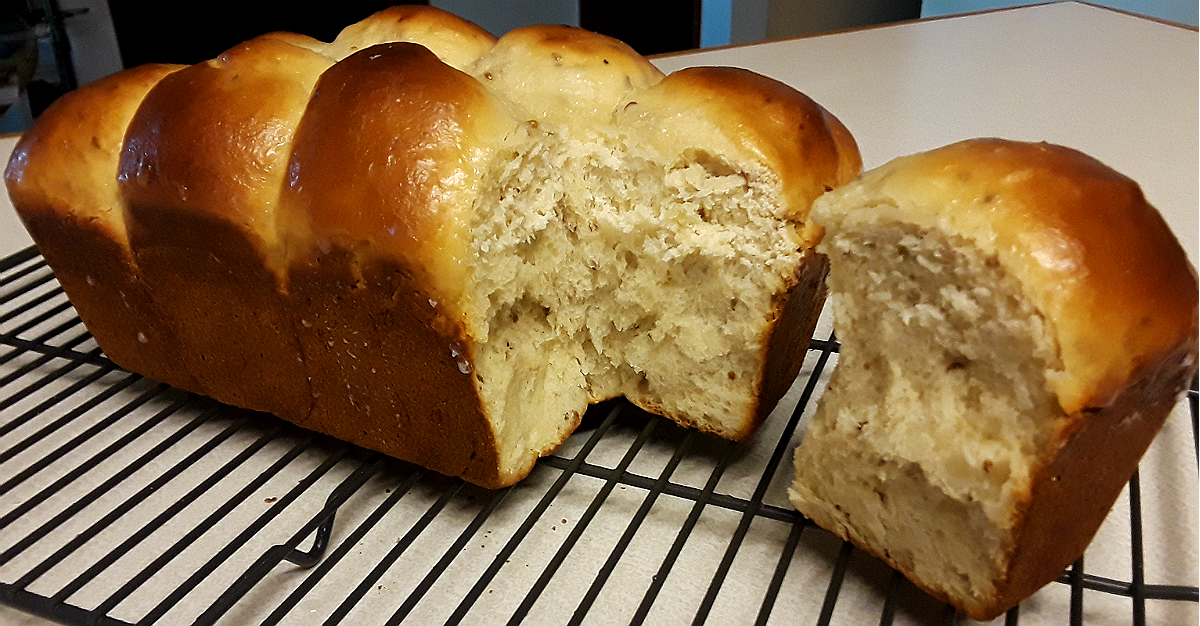
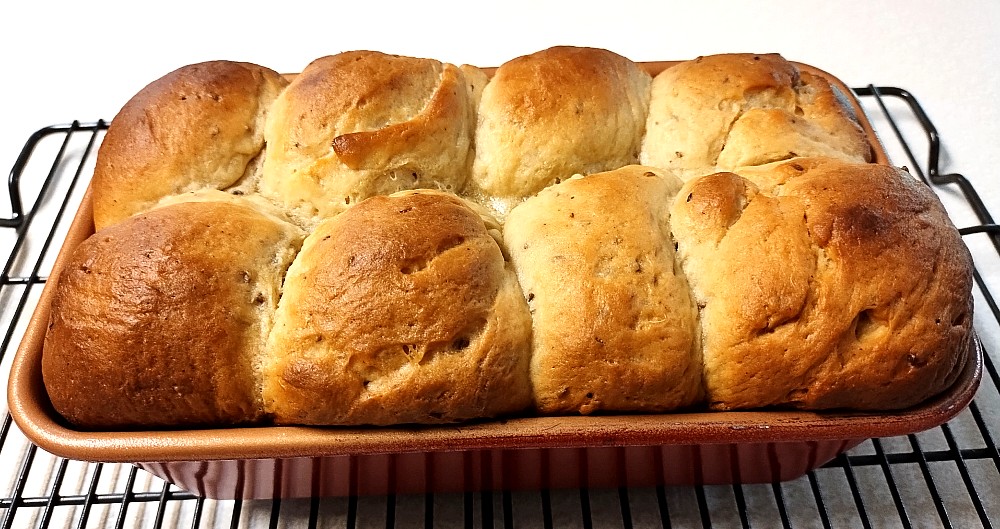
Mosbolletjies Bread
We’re pleased to build on the foundation started by the previous owners of our house and expand on it because I think the suburban landscape has incredible potential to create biodiverse ecosystems on a small scale that can add up to having a big impact.
I went back to the rural area I grew up in to scatter the ashes of one of my brothers by the creek that ran through our old farm. As I gazed across the landscape, I was struck by the distinct lack of plant diversity. It was all row crops producing corn and soybeans. It’s a utilitarian landscape geared to maximizing the return on investment of very expensive land through the production of commodities.
I’m not knocking it. Modern agriculture has created an abundance of food the likes of which civilization has never known. But climate change is real and pollinator wildlife is under severe threat. The modern production of commodity agriculture shows no real signs of adjusting.
I think a more productive route is to promote a culture that embraces gardening of all kinds as a lifestyle in urban and suburban areas. The urban and suburban landscape can be a canvas to create a new kind of living art that satisfies the soul, promotes physical activity and fosters a sense of connection to one’s surroundings and nourishment.
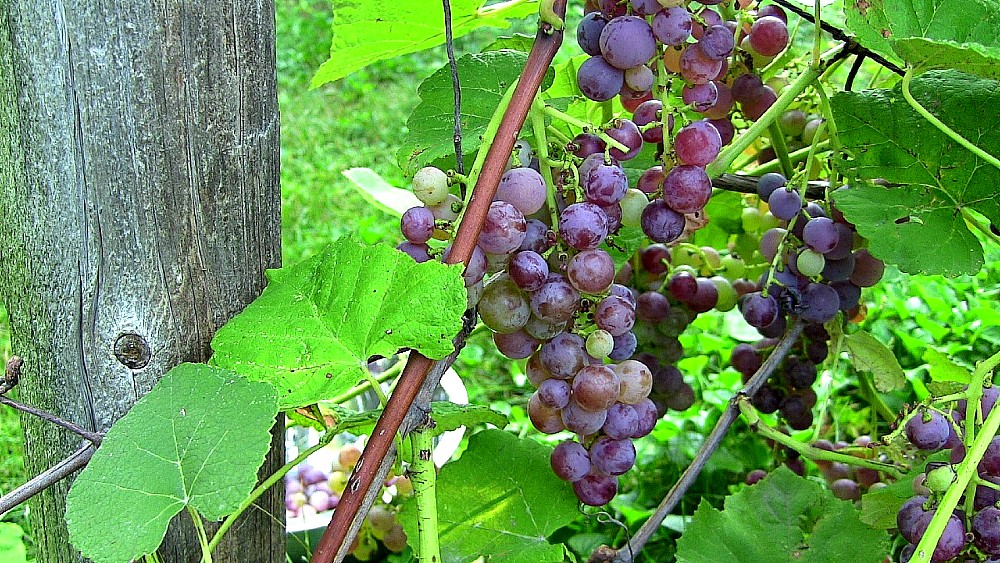
Marechal Foch Grapes
Ingredients:
This is a basic ratio of ingredients that should be used for any quantity of juice you may have.
1½ cups Grape Juice
2 tbsp. Ball Classic Pectin
1 cup Sugar
***Add ¼ tsp. Citric Acid per cup
Directions:
Step 1: Bring your grapes to a low boil and simmer for 10 minutes. Strain through fine cheesecloth or a chinois.
Avoid the temptation to strain twice to make the juice clearer. It removes too much of the natural pectin and makes for a loose jam.
Step 2: Add the juice and pectin to a large pot and bring to a rolling boil.
Step 3: Boil the juice and pectin for one minute.
Step 4: Add sugar and continue boiling and stirring until the sugar completely dissolves. Boil hard for one minute.
The sugar must be added last or the jam won’t set.
Step 5: Ladle the hot liquid into canning jars and process using the water bath canning method for 10 minutes.
If using a pressure canner, process at 6 lbs. for 10 minutes. Allow the canner to completely depressurize naturally before removing the jars.
According to History of Food by Maguelonne Toussaint-Samat, the ancient Greeks and Romans positively hated rye flour. Throughout the recorded history of the early civilized world, the rye plant seems to have been universally despised.
Somewhere in the Middle Ages, for reasons unexplained, people in Central Europe and Scandinavia spontaneously started liking the flavor of rye. These are my people.
Peasants in Central and Northern Europe grew rye and wheat plants together for sound agricultural reasons. While wheat was the staple grain in the warm climates of Egypt, Mesopotamia and Southern Europe, it grew less well in the colder northern regions. The rye plant thrived in cooler temperatures. Growing both plants together reduced the risk of a bad harvest for people in the North.
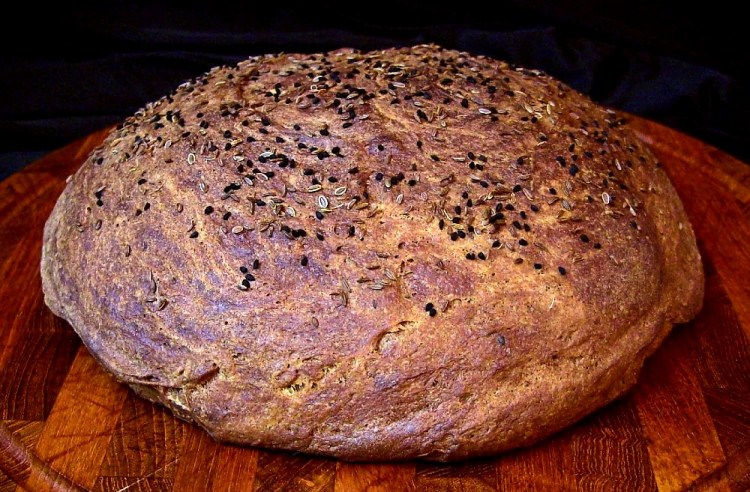
The harvested grain was called maslin. Rye flour has a low gluten content and produces tough, dense breads on its own. Breads made with rye flour benefit from the high gluten content of wheat flour. This combination of rye and wheat formed the basis of all the rye breads to come from Central Europe and Scandinavia, from light Lithuanian Lietuvaitė, to dense Scandinavian Rugbrød, to hearty German Pumpernickel and Russian Black Bread.
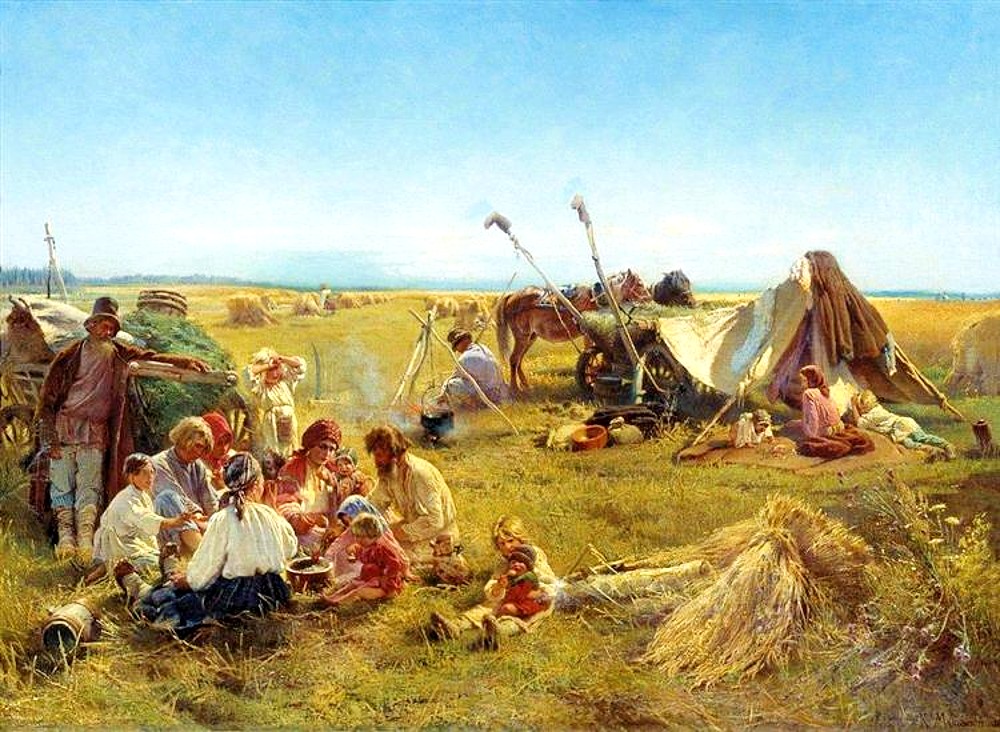
This recipe is definitely on the darker, heartier end of the spectrum and has gone through many variations over the years. The addition of unsweetened cocoa was the final touch of perfection. It is a staple bread in our household, drawing on the Eastern European heritage of our ancestors which I’m convinced is somehow tied up in our food craving DNA.
Peasant Dinner during Harvesting, Konstantin Makovsky, 1871
Ingredients:
327 grams (2⅓ cups) White Bread Flour
218 grams (1⅔ cups) Fine Dark Rye Flour
2 tsp. (1 packet) Active or Quick-Rise Dry Yeast
2 tsp. Sea Salt
1 tbsp. Unsweetened Cocoa Powder
4 tsp. Caraway Seeds, plus extra for sprinkling
2 tsp. Charnushka Seeds, plus extra for sprinkling
2 tsp. Dill Seeds, plus extra for sprinkling
1 Egg
3 tbsp. Molasses
375 grams (1⅔ cups) Warm Water
Directions:
Step 1: Combine dry ingredients and mix well. Add egg, molasses, and warm water. Knead for 8-10 minutes. This is a wet dough and rye flour is notoriously sticky; using the dough hook on a stand mixer is highly recommended.
Step 2: Set aside in an oiled bowled and let proof until doubled in size – usually about an hour.
Step 3: Knock back the dough and knead for several minutes on a floured surface. Form the dough into a smooth ball and place on a baking sheet covered with a silicone mat or parchment paper. Use a spray bottle to lightly mist the dough with water and sprinkle with more caraway, dill and charnushka seeds. Let rise for about another hour. Misting the loaf with water about half-way through helps prevent it from drying out.
Step 4: Preheat the oven to 450°F. Bake for 40 minutes. Use a spray bottle to mist the dough with 10-15 sprays every ten minutes to replicate the steam injection of commercial ovens. This helps develop a chewy crust. Turn the loaf around in the oven at the half-way point to ensure even baking. Let cool on a wire rack when baking is finished.
In honor of the opening night of the 2024 Olympics in Paris, I made a bread that has its origins in France and makes use of the French wine grapes that grow in our back yard here in Iowa and are ripening nicely at this time of year.
Mosbolletjies (moss – BALL – uh – keez) is a brioche-style bread featuring the juice of newly-harvested grapes and anise seed. It comes from South Africa but has its roots in France. The Dutch colonizers in South Africa recruited French Huguenots to start the wine industry there and the Huguenots brought this bread with them.
I’m using the juice of Marechal Foch grapes that were planted by the previous owner of our house back in the 1970s. The flavor of Marechal Foch grape juice has strong hints of cherries. The variety was developed as a wine grape in the early 1900s in France and is hearty in cold regions. It’s a common grape in the Upper Midwest and Canada.
Marechal Foch Grapes
This bread is traditionally made with butter, but I do sometimes like to substitute olive oil because it is lighter and more heart-healthy.
Ingredients:
540 grams (4 ½ cups) Bread Flour
66 grams (⅓ cup) Sugar
28 grams (4 tbsp.) Dry Milk Powder
4 tsp. (2 packets) Active Dry Yeast
2 tsp. Sea Salt
3 tbsp. Anise Seeds
1 large Egg
7 tbsp. (3.5 oz.) Unsalted Butter, melted. Olive Oil can be substituted.
1 ¼ cups Grape Juice
1 Tbsp. Unsalted Butter for brushing, melted
Simple Syrup:
1 tbsp. Sugar
1 tbsp. Water
Directions:
Step 1: Combine flour, sugar, milk powder, yeast, salt and anise seeds. Mix in egg, melted butter and grape juice to form a dough and knead for 8-10 minutes. Set aside in an oiled bowl and cover. Let rise until about doubled in size.
This is a dense dough and it’s a good idea to let this proof in a slightly warm oven. I like to turn the oven on for one minute and turn it off. That warms it up just enough.
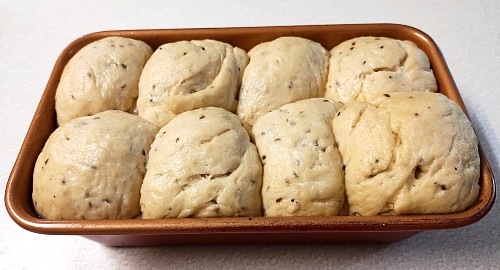
Step 2: Weigh out eight equal-sized portions of dough and form them into balls. Arrange them in an 8½” x 4½” standard-sized bread loaf pan that has been coated with a little oil or non-stick cooking spray. Place the dough balls in the pan two deep and four across and let rise until they come up to the top of the pan.
Mosbolletjies after rising
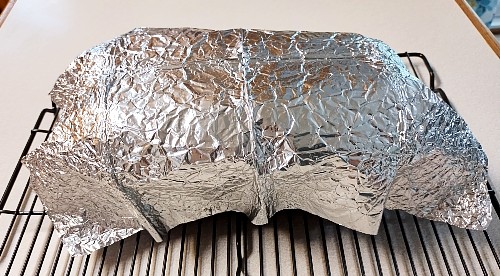
Step 3: Preheat the oven to 350°F. and bake for 45 minutes, tenting the bread with aluminum foil half-way through the baking time and rotating the pan. This prevents the bread from browning too much.
Tent with Aluminum Foil
Step 4: Brush the baked bread with melted butter while still warm in the pan and let cool before removing. When cooled, brush the bread with simple syrup.
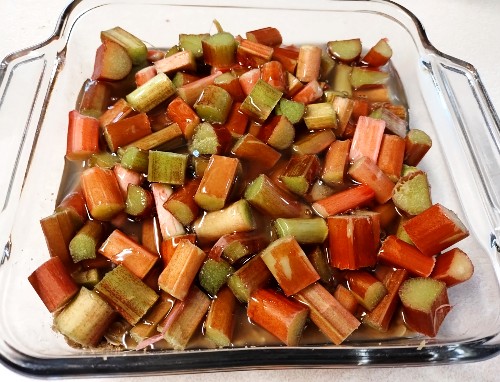
Rhubarb is the first produce in the garden to poke its head out of the snow after a long winter. While a few other signs of green life may be visible, it’s the emergence of rhubarb that truly signals that Spring is arriving.
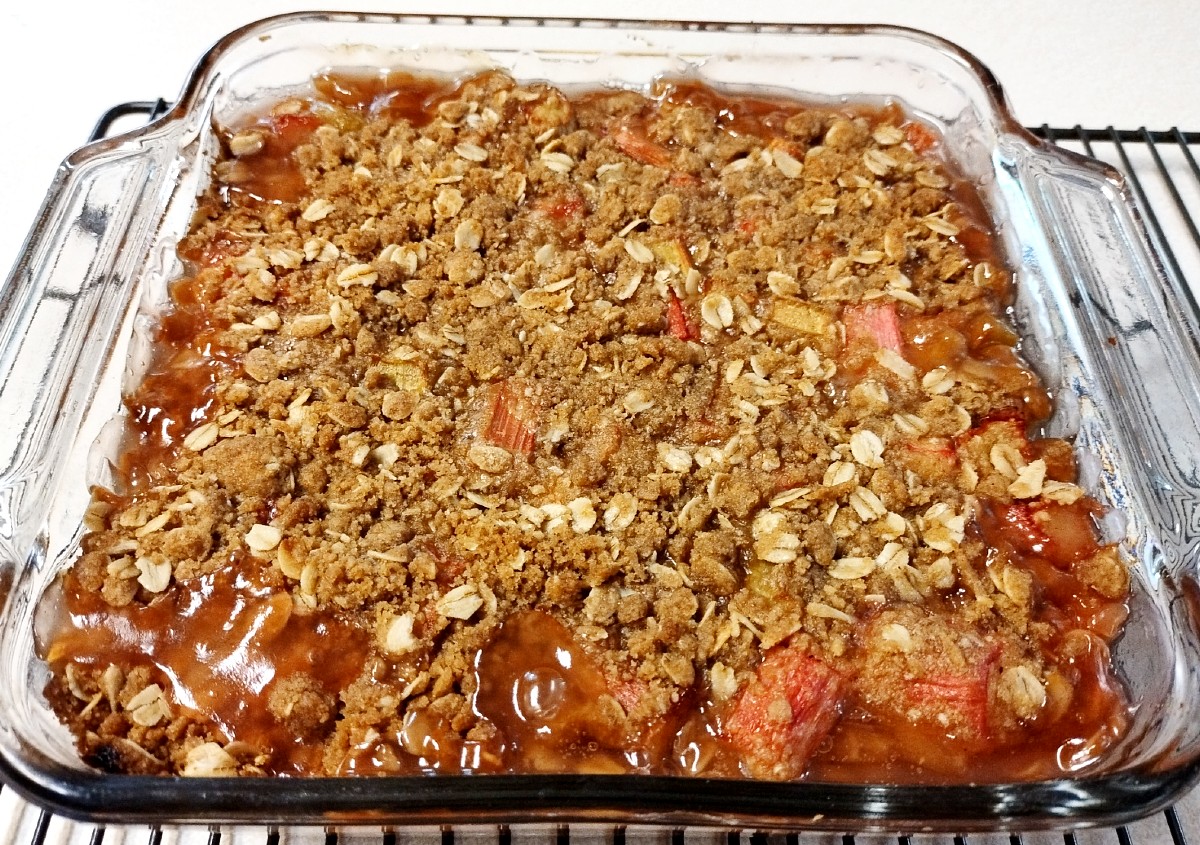
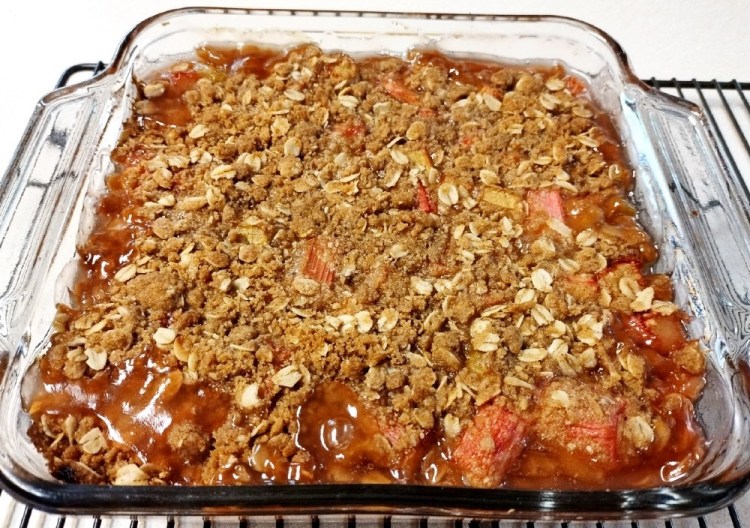
The flavor of those first stalks of Spring need to be showcased. The preparation should be simple and the other ingredients should support without drawing attention. For me, the best way to serve new rhubarb is in Rhubarb Crumble, sometimes called Rhubarb Crunch.
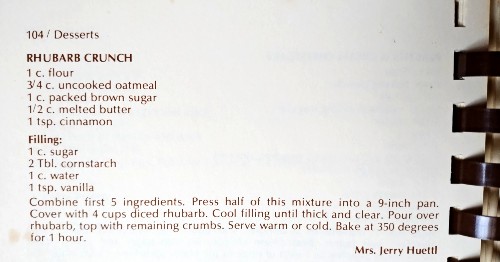
The ingredient list for this recipe appears almost verbatim in church cookbooks throughout the Midwest. It can be found on the internet under titles that reference various people’s grandmas. It is time-tested and true. Any attempt to fancy it up will bring in flavors that just get in the way.
Rhubarb Crunch Recipe submitted by Mrs. Jerry Huettl
So many church cookbook recipes came from sources like Ladies Home Journal that it is almost impossible to say what the true origin of a popular old recipe really is. The fact that a recipe like this filters its way through so many local cultures so as to be enshrined in a church cookbook as a certain family’s favorite strikes me as being very democratic. A mass market publication may have been the source, but people, in effect, voted for what they liked and the recipe was adopted into a community through the localized social media influencers of their day working with the medium they had available – the local church cookbook.
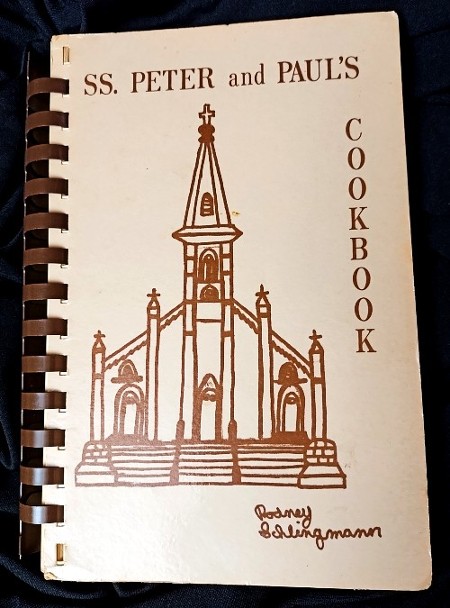
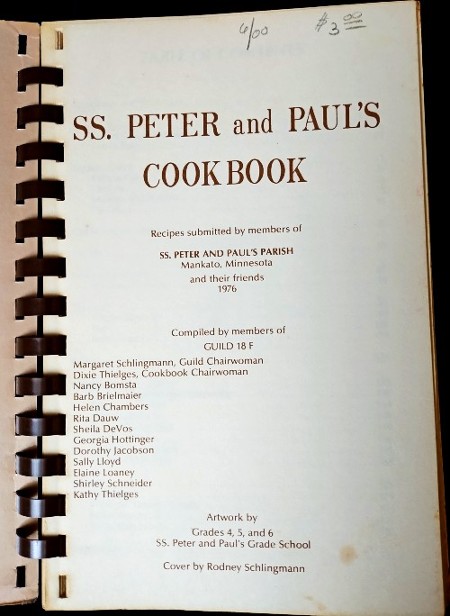
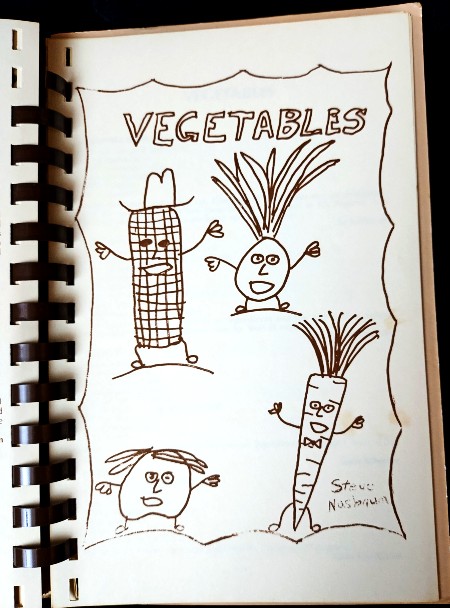
This particular recipe was submitted by Mrs. Jerry Huettl in the Saints Peter and Paul’s Parish Cookbook in Mankato, Minnesota published in 1976 featuring artwork by Grades 4, 5, and 6 of the Saints Peter and Paul’s Grade School. I think their artwork is utterly charming.
Saints Peter and Paul’s Parish Cookbook, 1976
Saints Peter and Paul’s Cookbook Credits
Charming Artwork by Steve Nusbaum
Ingredients:
4 cups Rhubarb, cut into one-inch pieces
The Filling:
1 cup Granulated Sugar
2 tbsp. Corn Starch
1 cup Water
1 tsp. Vanilla Extract
The Crumble:
1 cup All-Purpose Flour
¾ cup Regular Rolled Oats
1 cup Brown Sugar
1 tsp. Cinnamon
½ cup Melted Butter
Directions:
Preheat oven to 350° F.
For the filling, combine 1 cup granulated sugar and 2 tbsp. cornstarch in a sauce pan, add 1 cup water and stir until smooth. Cook mixture over medium-high heat and bring to a boil while stirring constantly to avoid burning. Continue stirring while simmering for about two minutes until the mixture thickens. Remove from heat and stir in 1 tsp. vanilla extract.
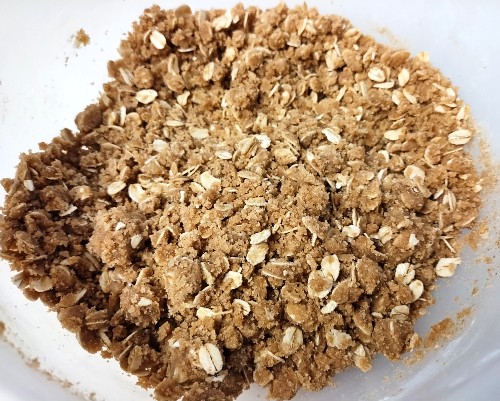
For the crumble, combine 1 cup flour, ¾ cup rolled oats, 1 cup brown sugar, 1 tsp. cinnamon and ½ cup melted butter.
Crumble Mixture
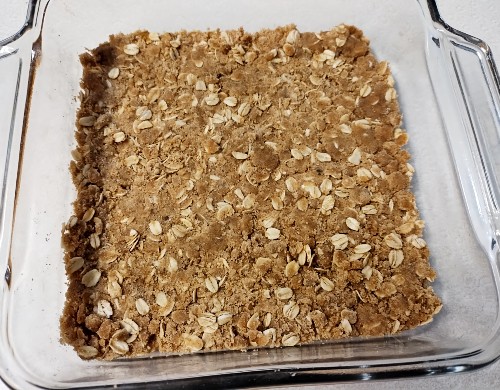
Press half of the mixture into a two-quart baking dish.
Crumble base pressed into baking dish
Cover the base with the four cups of diced rhubarb. Pour the thickened filling mixture over the rhubarb.
There will be an update to this post coming after the holiday season of 2024. In future, I will not be cooking the pork and bacon in advance of baking all the ingredients together in the pie shell, which is more traditional anyway. I’d always been a little freaked out about this but shouldn’t have. I still think it’s a good idea to cook the chicken in advance of the bake in order to reduce some of the moisture. We’ll see…
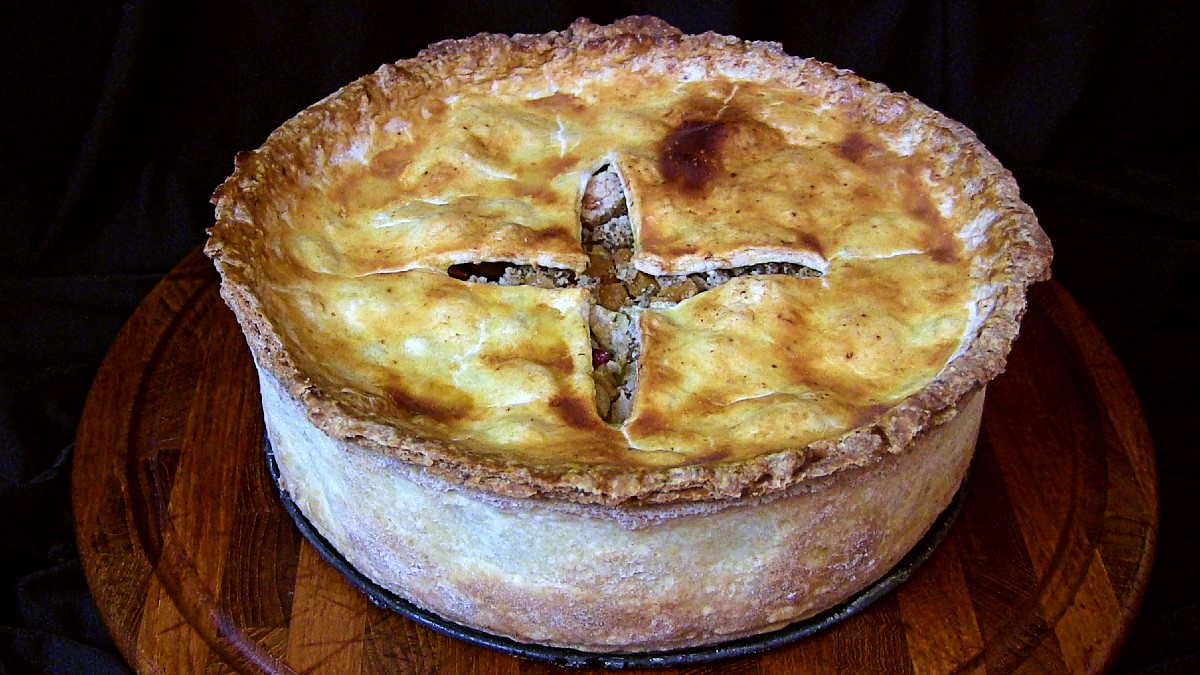
Yorkshire Christmas Pie gives me a warm, Charles Dickens kind of Christmas feeling. It features sausage, chicken, chestnuts, dried apricots, cranberries and spices like nutmeg, mace and ginger. The pie has been an annual tradition for Deb and I ever since a massive Christmas Eve blizzard changed our holiday travel plans in 2017. Since we couldn’t go anywhere, we decided to try a new cooking experience in the spirit of “A Christmas Carol.”
Yorkshire Christmas Pies have their roots in the gigantic wild game pies of the middle ages. Large birds, like geese, would be stuffed with consecutively smaller birds along with other wild game and baked with fruit and spices in a pastry crust.
Royal Christmas: an 1857 print of the arrival of Queen Victoria’s Christmas banquet including the stuffed wild boar’s head and gigantic game pie.
The basis for this pie comes from the recipe on the BBC Good Food website. I’ve tweaked it in several ways. The BBC recipe calls for sausage, but does not specify what kind. I used my recipe for homemade English Banger Sausage. I cut the chicken breast into bite-sized pieces to make serving easier and I’ve increased the amount of dried apricots and roasted chestnuts and added an egg to help as a binder.
This is wonderful heritage food that deserves to be kept alive. It’s not fast, convenience food but it’s not fussy to make either. Only a modest skill level is needed to make an explosion of holiday flavor. Skilled bakers can make a pie much prettier than I and there is room for experimentation with ingredients. Some versions of Yorkshire Christmas Pie are solidly dense with ground pork and would make serving very convenient. I don’t mind a bit of crumble because of the jumble of flavors.
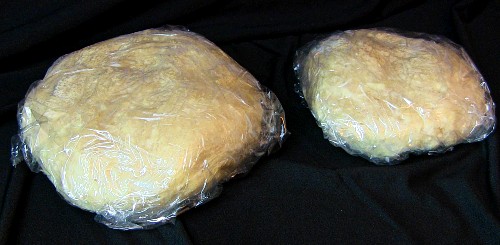
Use ⅔ of a double-sized shortcrust pastry dough for the shell of the pie and ⅓ for the cover.
Double Crust Pie Dough
Filling:
1 lb. Chicken Breast, cooked and cubed
1 Medium Onion, finely chopped and sautéed
1 ½ lbs. Ground Pork
¼ lb. Bacon, finely chopped
1 cup Dried Bread Crumbs
1 cup Cranberries, chopped
⅔ cup Dried Apricots, course chop
⅔ cup Chestnuts, roasted, peeled, and chopped
3 tsp. Sea Salt
1 tsp. Ground Black Pepper
1 tsp. Ground White Pepper
1 tsp. Mace Threads, freshly ground
½ tsp. Nutmeg, freshly ground
½ tsp. Ground Ginger
1 tsp. Dried Sage
1 tsp. Dried Thyme
Zest and Juice of 1 Lemon
1 Large Egg, whisked for the filling
1 Large Egg and a dash of milk for egg wash
Directions:
Step 1: Cook chicken, allow to cool and cut up into bite-sized pieces. Sauté onion and set aside.
Step 2: Coat a 10-inch diameter x 2.27-inch springform pan with oil or non-stick spray. Roll out ⅔ of a double crust pie dough and line the pan with the dough. Put the pan into a freezer for at least 15 minutes.
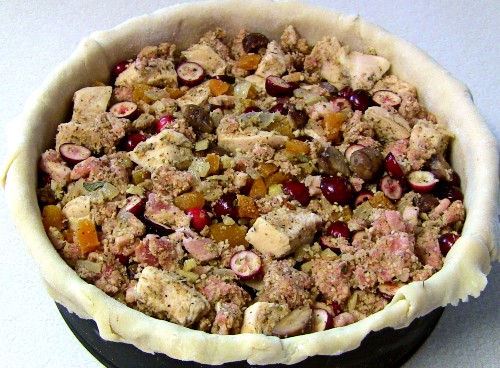
Step 3: Preheat oven to 375°F. In a large bowl, combine cooked chicken, ground pork, bacon, sautéed onions, chestnuts, dried apricots, cranberries, dried bread crumbs, spices, lemon zest, lemon juice and whisked egg.
Roll out the remaining pie dough for the pie’s lid.
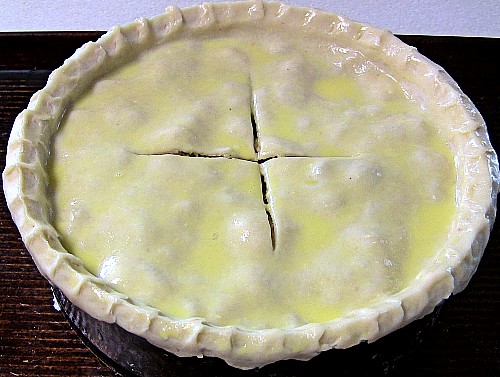
Step 4: Fill the pie shell with the mixture. Press the contents down in order to get the mixture to hold together when baked. Place the pie dough lid on top of the pie shell and mixture. Seal the edges around the rim of the pie. Cut an “X” shape in the middle of the pie to act as a vent. Brush generously with egg wash.
Christmas Pie Ingredients in Shell
Christmas Pie with Egg Wash
Step 5: Place the pie tin on a baking sheet and bake for 60-65 minutes.
***Do yourself a favor and make this one or two days before serving. The flavors are much more pronounced and full when they have a chance to meld. Traditionally, this is meant to be served cold, but I like to reheat slices of the pie in an oven before serving.***
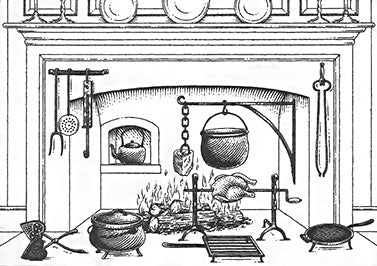
Boston Brown Bread with Baked Beans is a Saturday night meal tradition in New England that has roots going back to colonial days in the 1600s. The bread combines the English method for making steamed puddings with grains that were native to North America, or at least grew well in the harsh northern climate, and were inexpensive compared to white wheat flour. Both the bread and a pot of beans could be slow-cooked in the hearth of a fireplace in a time when ovens and stoves were scarce.
Cooking in an open hearth Image from arcandhammer.com
It’s a truly heritage food from early American history in which colonial settlers combined a familiar old world cooking technique with corn, which was a new grain to them, as well as familiar grains like rye and whole wheat which had been common to the working poor folk of northern Europe. This was a food for hard working people. White wheat flour was precious and had to be reserved for special delicacies.
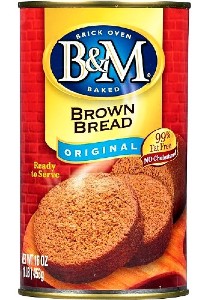
It came to be a tradition in New England to make Boston Brown Bread in leftover coffee cans that gave the bread a cylindrical shape. It can still be purchased in cans in the New England region.
B&M Brown Bread
It’s much more practical to make this bread in a standard 8½” x 4½” loaf pan that most people have easy access to rather than messing around with old coffee cans. This recipe can also be made in a 10-cup Bundt pan which makes a pretty cool looking bread.
Anyone who’s tried to make traditional baked beans from scratch knows that they take hours and hours to make properly. I’ve come up with a very convenient way to make them in a pressure cooker that takes a fraction of the time and tastes great. I suppose they’re technically not “baked” beans, but everyone knows what that style means.
Baked Beans on slices of Boston Brown Bread is a hearty, stick-to-the-ribs meal that goes well with cool Fall weather, football and playoff baseball, or putting the garden to bed before winter. Or just enjoying cool evenings and the golden, rust-colored leaves still hanging onto the trees.
Fountain Grass in Fall
Boston Brown Bread
Ingredients:
¾ cup Whole Wheat Flour
¾ cup Rye Flour
¾ cup Yellow Cornmeal
1 tsp. Baking Soda
1 tsp. Sea Salt
1½ cups Buttermilk
½ cup Molasses
2 tbsp. Butter, melted and slightly cooled
Directions:
Step 1: Preheat oven to 325°F. Whisk ¾ cup whole wheat flour, ¾ cup rye flour, ¾ cup cornmeal, 1 tsp. baking soda and 1 tsp. salt together in a large bowl.
Step 2: Whisk 1½ cups buttermilk, ½ cup molasses and 2 tbsp. melted butter together in a second bowl.
Step 3: Add the buttermilk mixture to the flour mixture and stir until combined.
Step 4: Spray an 8½” x 4½” loaf pan or a 10-cup Bundt pan with non-stick cooking spray and pour the mixture into the pan. Tamp the pan down a few times and allow to settle for a couple of minutes. Place the bread pan in a baking dish with a cover and pour hot water into the baking dish until the water comes halfway up the outside of the bread pan. Cover the baking dish with a lid and bake for one hour.
Fill with hot water halfway up sides of bread pan.
Covering the pan steams the bread.
Brown Bread fully baked.
Baked Beans
Ingredients:
1 cup Great Northern Beans
1 cup Pinto Beans
2 Bay Leaves
7 cups Water
¼ tsp. Baking Soda
2 cups Onion, chopped
3 tbsp. Garlic, chopped
½ lb. Bacon, diced
⅓ cup Molasses
3 tbsp. Worcestershire Sauce
8 tsp. Dry Mustard Powder
3 tsp. Ground Black Pepper
4 tsp. Sea Salt
Directions:
Cook beans, bay leaves, and ¼ tsp. baking soda in 7 cups water in a pressure cooker on high for 10 minutes. Let depressurize and reserve 2 cups liquid. Drain beans and rinse.
Sauté ½ lb. bacon, 2 cups onions, and 3 tbsp. garlic. Return beans and combine all remaining ingredients in the pressure cooker with the 2 cups of reserved liquid and cook on high for 10 minutes.
***There will be a fair amount of liquid left after cooking that will need to be drained, but it’s a good idea to let the beans absorb as much liquid as they can.
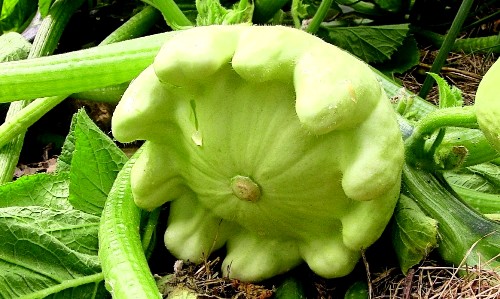
My next-door neighbors and I exchanged plants we grew from seed this year. They got Ausilio Peppers and we got Pattypan Squash. This bread is a nice savory alternative to the many sweet quick breads that make use of summer squash and zucchini.
Our neighbors are terrific cooks and we often exchange home-cooked goodies throughout the year. We’ll notify each other with a text that ends with the sentence, “Meet at the fence?”
Pattypan Squash
On August 10, 2020, their house took a direct hit from a fallen tree that came down during an historic derecho wind storm. I pitched in and helped with the cleanup and, when an arborist was finally able to cut down most of the tree, I was able to take some the sections and make a kind of stumpery/art installation out of them. I call it “Stumphenge.” The wildlife – and our dog – love it.
Bindi the Beagle in Stumphenge
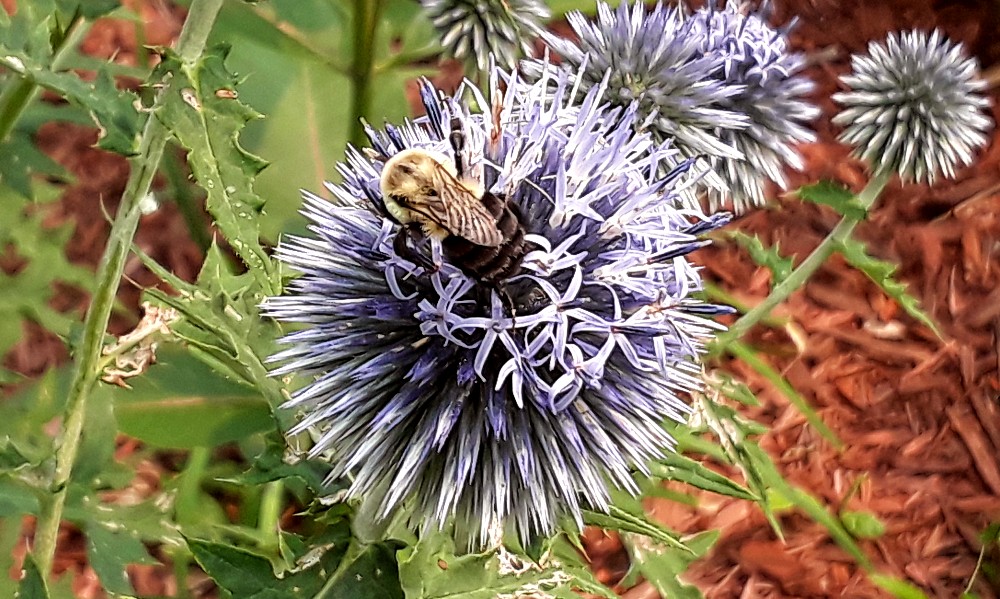
Our neighbors did an insightful thing by leaving the majority of the dead tree standing because it is a home for squirrels, birds and insect life. On our side of the fence, we’ve converted a great deal of our backyard into a pollinator-friendly perennial garden. We’re rewarded with copious firefly displays at dusk and bee and butterfly activity during the day. The increased bird activity keeps damaging insects like Japanese beetles in check without having to resort to chemicals.
Old Life and New Life
I think the suburban landscape has incredible potential to create biodiverse ecosystems on a small scale that can add up to having a big impact. Good garden design will be key to making attractive pollinator gardens that blend with existing urban and suburban neighborhoods.
My father was something of an agricultural pioneer having been 10-15 years ahead of his time in soil-conserving tillage practices and trying to get away from heavy chemical use on a commercial working farm. I’ve carried those principals with me and am proud to have nurtured a soil in my backyard that is teeming with insect and microbial life, but the reality of modern commercial agriculture is such that the Iowa countryside is distinctly lacking in diverse plant life and the soil is treated as merely a sterile medium to pump fertilizer into. Urban and suburban landscapes offer some of the greatest potential to become pollinator havens.
Bee on a Globe Thistle
Ingredients:
240 grams (2 cups) All-Purpose or Bread Flour
2 tsp. Baking Powder
½ tsp. Baking Soda
1 tsp. Sea Salt
¼ tsp. Black Pepper
2 tbsp. Fresh Dill Weed, chopped
2 tbsp. Green Onions, diced
1 cup Extra-Sharp Cheddar Cheese, shredded
2 Large Eggs
50 grams (¼ cup) Olive Oil
114 grams (1/2 cup) Milk
1 cup Summer Squash, shredded
Directions:
Step 1: Combine flour, baking powder. baking soda, salt, pepper, dill weed, green onions and cheddar cheese.
Step 2: In a separate bowl, beat the eggs, then add olive oil and milk.
Step 3: Squeeze the excess moisture out of the squash, then add to the liquid mixture.
Step 4: Add the liquid ingredients to the dry ingredients and stir until just combined.
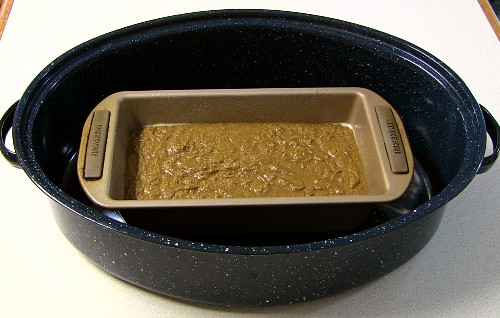
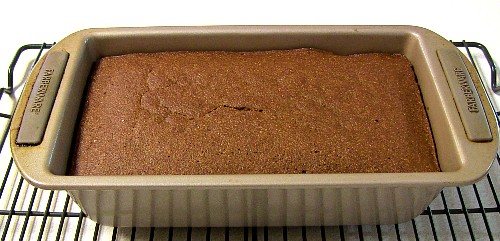
Step 5: Pour the batter into a greased standard-sized loaf pan and bake in an oven preheated to 350° for 45 minutes or until a knife inserted in the center comes out clean.
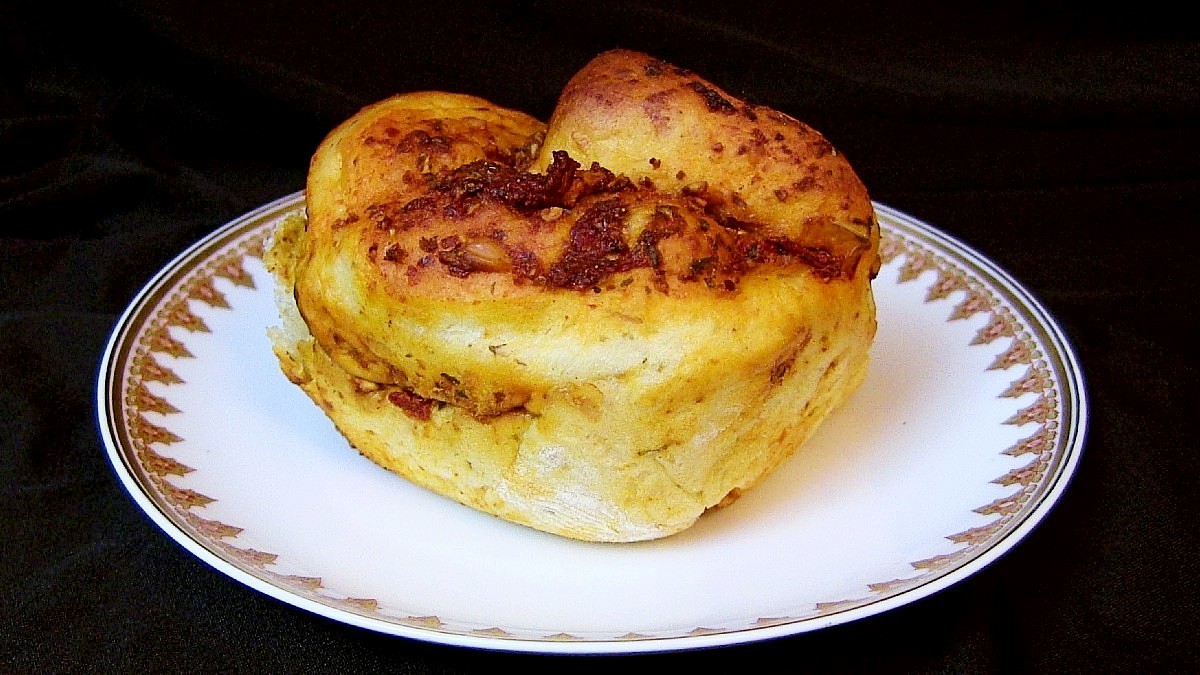
Pita con Sarde look like cinnamon rolls but the filling is a savory blend of peppers, garlic and anchovy. The Italian immigrants who settled on the south side of Des Moines, Iowa in the early 1900s made these as their own regional variation on a Calabrian dish called Pizza con la Sardella.
Des Moines chef George Formaro remembers his father making the spicy paste used in Pita con Sarde by rehydrating and fermenting dried chilis in a large crock and mixing them with assorted spices and salted anchovy. Tumea & Sons Restaurant are known to feature Pita con Sarde and supply them to Graziano Brothers market.
A Des Moines-based blogger named Monica Riccio grew up on Des Moines’ south side among the Italian community there and did a brilliant job of reverse-engineering a recipe based on the memories of her and her husband. I altered her recipe because I wanted to make a larger batch that would fill a 9″x13″ baking dish and freely admit to using convenience items like tomato and anchovy paste from a tube. I also wanted to feature the roasted Ausilio Thin Skin Italian Peppers I grow in my garden while they’re in season and skip the rehydrating and fermenting process of the traditional method.
Ausilio Thin Skin Italian Peppers are another great Des Moines story. I first heard about the peppers in 2017 when CBS Sunday Morning talked about them in a feature story on The Doomsday Vault and how important seed saving is for genetic diversity and preservation of heritage plants. The seeds for this variety were brought from Italy to America in the early 1900s. Giovanni and Rachel Ausilio saved seeds from the peppers they grew and passed them down to their daughter, Theresa Ausilio Riccelli, who then passed that tradition down to husband and wife couple Chad and Michele Ogle-Riccelli. Chad and Michele’s children are the fifth generation to carry that tradition forward. In 2015, Chad and Michele compiled a massive amount of documentation about their family peppers and contacted the Seed Savers Exchange based in Decorah, Iowa.
Toby Cain was an employee of the Seed Savers Exchange at the time and writes an account of how the Ausilio Thin Skin Italian Pepper came to be preserved and available to anyone who would like to grow them in an article that appears on the Grinnell University website. Toby writes that when the documents arrived in October, 2015 it was the most thorough documentation they had seen in their collection up to that point.
A delegation from the Seed Savers Exchange visited the home of Chad and Michele Ogle-Riccelli in Des Moines later that month for dinner and Theresa Ausilio Riccelli handed over a jar of seeds that the Seed Savers Exchange have been propagating ever since. Included in the meal that night were Pita con Sarde.
I’ve been purchasing seedlings of the peppers at Chef George Formaro’s Gateway Market and growing them in our garden since 2018. They’re an important part of the homemade pasta sauce we preserve through canning and enjoy all year long.
This year, in 2023, I decided to grow them from seed and have included an account of that after the recipe.
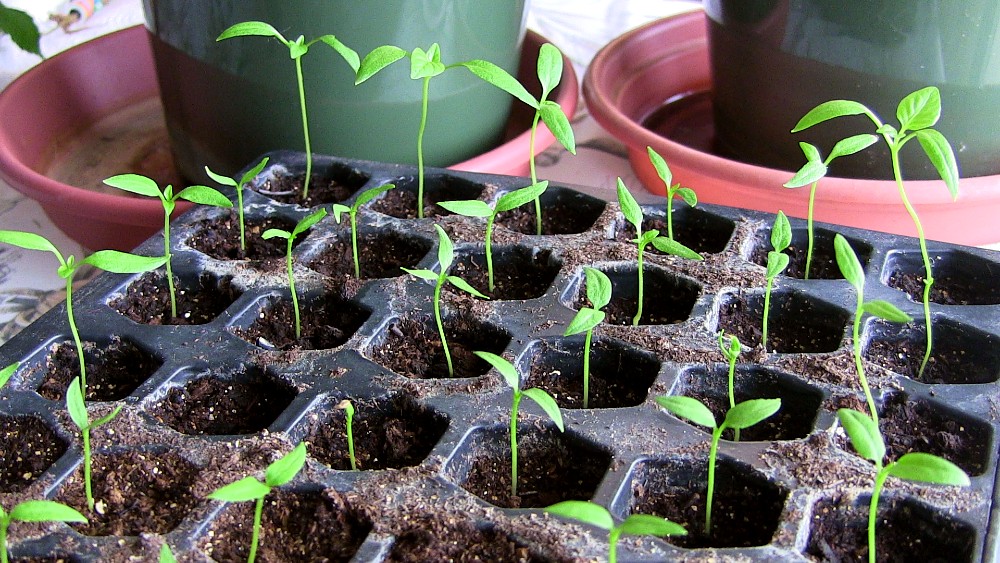
Ausilio Pepper Seedlings
Ingredients:
Dough:
600 grams (5 cups) Bread or All-Purpose Flour
60 grams (¾ – 1 cup) Grated Parmesan Cheese
28 grams (4 tbsp.) Dry Milk Powder (optional)
2 tsp. Italian Herb Seasoning
2 tsp. (1 packet) Instant Dry Yeast
2 tsp. Sea Salt
2 tbsp. Olive Oil
1 Large Egg
330 grams (1½ cups) Warm Water
Filling:
Roasted Bell Peppers are easily available in jars at grocery stores and can be used in this recipe as a substitute for homegrown peppers. Ausilio Peppers are medium heat, so adjust to taste with crushed red pepper flakes.
150 grams (1 cup) Roasted Red Peppers, finely diced or puréed (See How to Roast Peppers after the recipe)
2 tbsp. Minced Garlic
2 tbsp. Olive Oil
1 tbsp. Anchovy Paste
1 tbsp. Tomato Paste
1 tbsp. Smoked Paprika
2 tsp. Italian Herb Seasoning
2 tsp. Crushed Red Pepper Flakes (This amount could vary depending on the heat of your roasted peppers)
Directions:
Step 1: Combine flour, cheese, milk powder, Italian herb seasoning, yeast and salt for the dough. Add egg, olive oil and water and mix well. Knead for 10 minutes and set aside in an oiled bowl. Cover and let rise until doubled in size, usually about an hour.
Step 2: Mix the ingredients for the filling together to form a paste.
Step 3: Knead the risen dough to form a smooth ball. Let the dough relax for about five minutes. Dust a countertop with plenty of flour. Use a rolling pin to roll out the dough until it is approximately ¼ inch thick, dusting liberally with flour to prevent sticking.
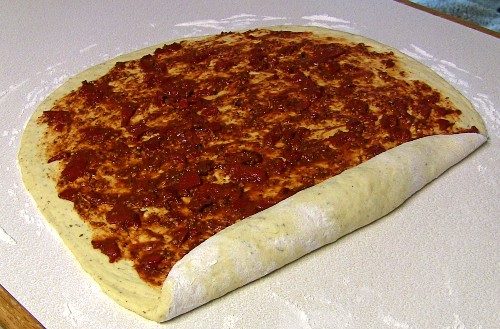
Step 4: Spread the filling around the outer edge of the dough with a spatula. Continue spreading the rest of the filling from the outside in to the middle.
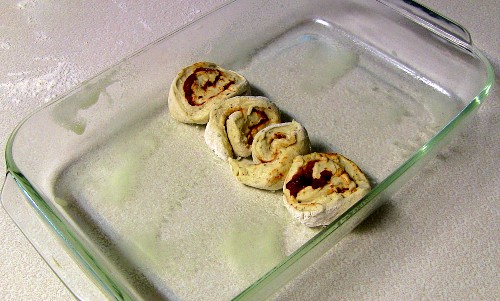
Rolled Dough with Pepper Paste
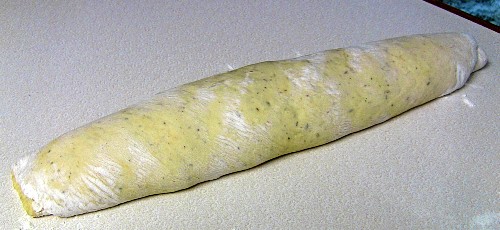
Step 5: Roll up lengthwise from one end to the other to form a cylinder. Slice into approximately two inch rounds and arrange in an oiled 9″ x 13″ pan. Place the thinner outer slices in the middle of the pan and fill up the rest of the pan with the fatter rolls from the inner part of the cylinder. The rolls will bake better that way. Let rise for about 30 minutes.
Roll the Dough
Rolled Dough
Place four thin rolls from the outer ends in the center of the pan.
Place three thicker rolls working from the middle to the edges of the pan.
Rolls after 30 minutes of rising time.
Step 6: Place the baking dish on a sheet tray and bake in an oven that has been preheated to 375°F. for about 30 minutes.
If you really want to gild the lily you can brush on a tablespoon of melted butter when they’re fresh out of the oven.
How to Roast Peppers:
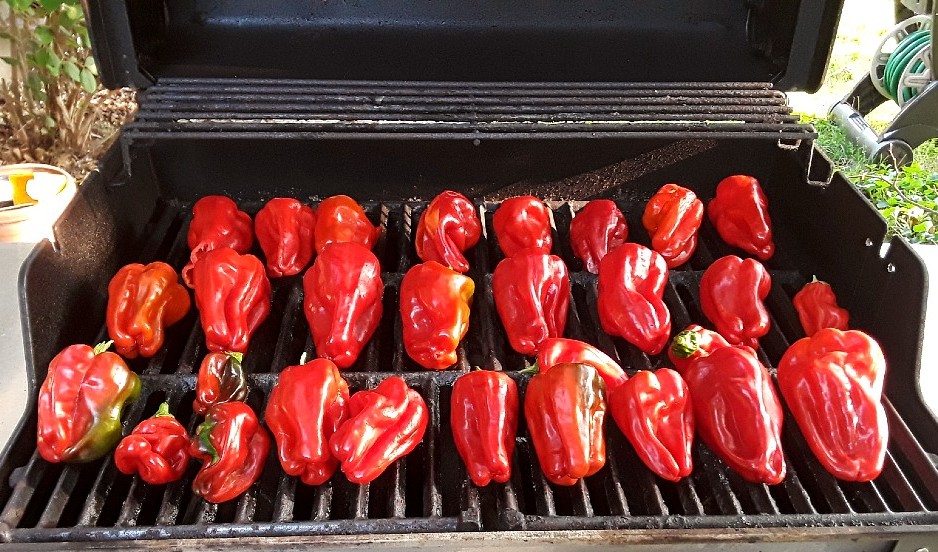
Ausilio Thin Skin Italian Peppers roasting on a grill.
Roasting peppers concentrates their sweetness and adds a touch of smokiness. Peppers can be roasted over fire on a grill, in a skillet on a stovetop, baked in an oven at 400°F. or using the oven’s broiler setting.
Use tongs to rotate the peppers in order to get a good blackened char all over the skin. Place the peppers in a Ziplock bag or a bowl covered in plastic wrap and allow the steam to loosen the thin outer layer of skin. Once cooled, the thin, blackened outer layer can be easily removed.
Growing Notes:
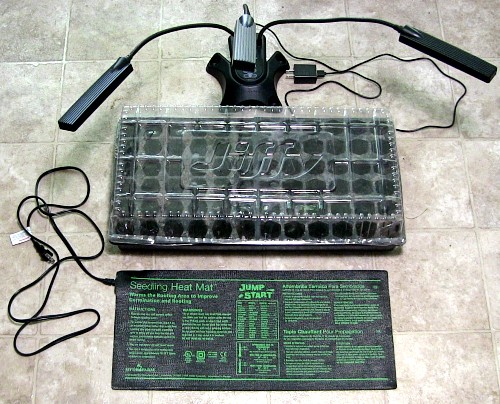
I started growing seedlings for Ausilio Thin Skin Italian Peppers in mid-February, 2023. I started earlier than is often recommended because we don’t have a south-facing window much less a greenhouse. Needed equipment includes a seed starter tray with lid, heat mat, LED grow light and a proper seed starter soil mix.
Heat Mat, Seed Starter Tray and LED Grow Light
I used a spray bottle to water the soil twice a day and the seeds started to sprout after a week. Most sources I read said to expect about 50% germination for peppers, but of the 36 seeds I planted, 34 sprouted. After the seeds sprouted, I took the lid off the tray during the day and only put it on for overnight to retain heat. Young seedlings can get moldy and die if they don’t get ventilation.
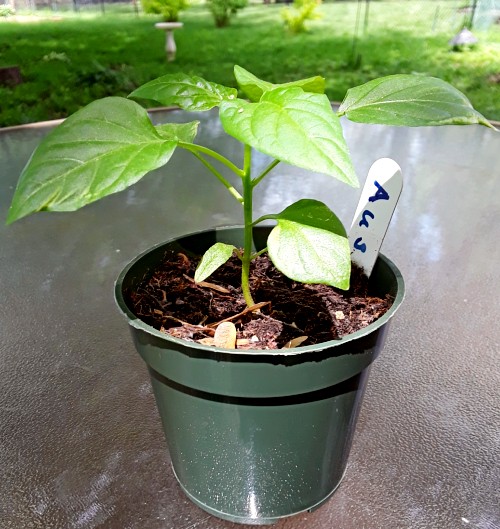
After about five weeks of growth, the seedlings had developed their true leaves and were ready to be potted up into their own containers with proper potting soil. All seedlings had their own pot by April 1st. I augmented the natural light of our west window with LED grow lights until about 9:00 pm. The extra light was vital to successful growth.
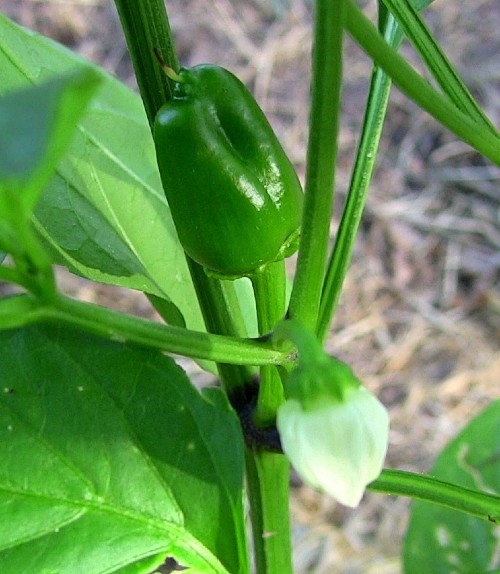
As the weather warmed to above 70°F. in April, I was able to get the plants outside for extra light and heat and get them used to a little breeze. That process is called “hardening off” and their growth really shot up. By mid-May they were ready to be planted in the garden. The seedlings were planted in the garden on May 21st and the first pepper was sighted on June 23, 2023.
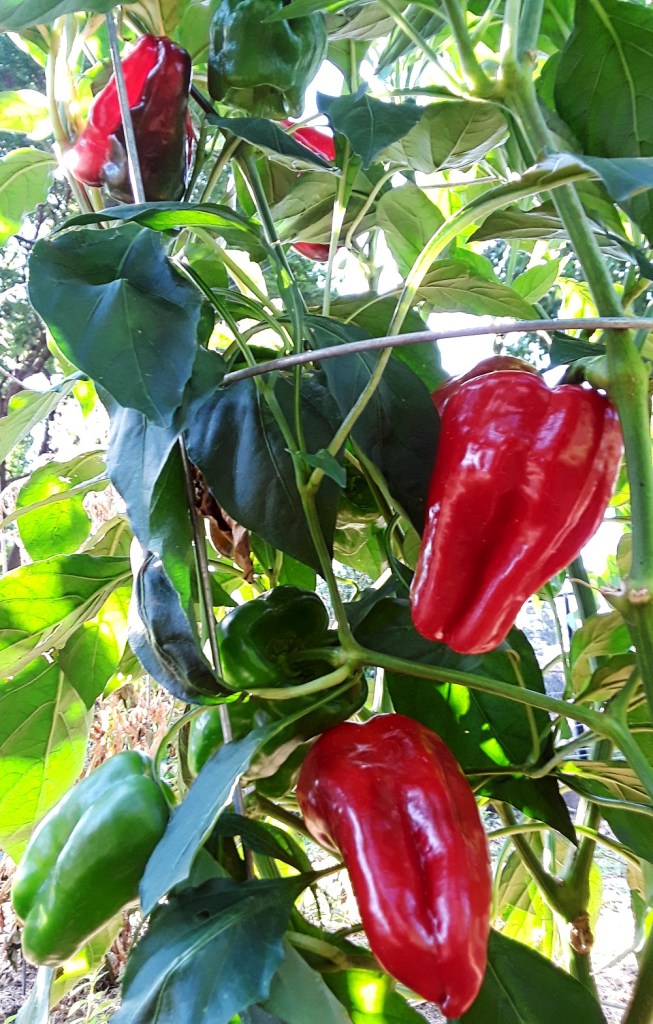
Ausilio Thin Skin Italian Peppers are abundant producers throughout the whole season and are a pleasure to eat raw, stuffed or added to pasta sauce.
Seedlings planted in the garden on May 21, 2023.
First Ausilio Pepper on June 23, 2023.
Ausilio Thin Skin Italian Peppers on August 8, 2018